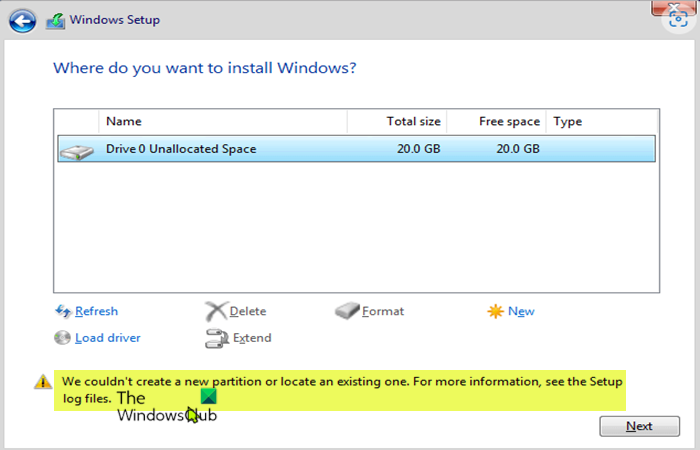
Windows Setup couldn’t create a new partition or locate an existing one
If you get the We couldn’t create a new partition or locate an existing one when you try to clean install Windows 11 or Windows 10 on your device, you can try the recommended solutions in the order presented below to resolve the issue on your system. Let’s take a look at the description of the process involved concerning each of the listed solutions. Before you jump right into the solutions below, make sure to disconnect additional peripherals like hard drives, USB drives, and Memory cards. Only have the bootable USB drive plugged in and make sure you’re not using a USB 3.0 bootable drive, rather try using a USB 2.0 drive. Once you disconnect all your other hard drive(s), try to install Windows again and see if you can proceed with the installation without encountering the error.
1] Refresh the Windows installation
The first step you can take to quicky and easily resolve the We couldn’t create a new partition or locate an existing one when you try to clean install Windows 11/10 on your device is, to give the installation a quick refresh. To perform this task, do the following:
Unplug any USB external drive.While in the Windows installation error dialog, unplug the Windows installation USB from the PC and wait for 15 to 30 seconds.Plug the USB back to the PC and click on Refresh.
Now, see if you can proceed with the OS installation without issues. Otherwise, try the next solution. Read: Windows 11 won’t install [Fixed]
2] Change SATA configuration in BIOS
You may encounter this issue if the HDD controller mode is set to AHCI or RAID and the system lacks appropriate drivers. In this case, to fix the problem, the disk controller must be interchanged to IDE. For this task, you have to boot into BIOS and make the required changes by following proper guidelines. You can find the proper guidelines in the instruction manual of the motherboard supplied at the time of buying it or check on the internet. Read: Windows was unable to create a required installation folder, Error 0x8030002F
3] Use DiskPart to create new partition
This solution requires you to use DiskPart to create a new partition, then install Windows 11/10 to that partition. To perform this task, do the following:
Start Windows setup using bootable USB or DVD.If you get the error message close the setup.Next, click the Repair button.Choose Advanced tools.Select Command Prompt.When Command Prompt opens, enter the following command and hit Enter:
Next, enter the following command and hit Enter:
You should see the list of all hard drives connected to your computer.
Find the number that represents your hard drive and enter the command below and be sure to replace 0 with a number that matches your hard drive.
Next, run the following commands and press Enter after each line:
After running the commands, type exit and hit Enter to close Command Prompt. Start the installation process again and see if it completes successfully. If not, try the next solution.
4] Make sure the Windows Install partition is set as Primary/Active
The issue you are currently facing could be due to the parttion you are trying to install Windows on is not set as primary or the active partition. So, make sure this isn’t the case. Do the following:
Start DiskPart as shown above.Next, type the command below and hit Enter
You should see the list of available hard drives.
Locate your hard drive and enter the command below and be sure to replace 0 with a number that represents your hard drive.
Next, type the command below and hit Enter
The list of available partitions will appear.
Now, locate the partition on which you want to install Windows and type the command below and hit Enter. Replace 1 with a number that matches your partition.
Lastly, type the command below and hit Enter to set the partition as primary/active.
Once done, type exit and press Enter to exit Command Prompt.
Every other thing being equal, you should be able to start and complete the installation process without any issue. Otherwise, you can review the Setup log files for further troubleshooting. Related post: We couldn’t create a new partition error 0x9cfc7550 during Windows Setup
Why can’t I create a new partition?
In some cases, the “We couldn’t create a new partition” error can be caused by an improperly created Windows bootable drive, especially if you used the Windows Media Creation Tool to create the bootable drive. To rule out this possibility, create the bootable device using third-party software like Rufus.
How do I fix a partition error?
You can repair errors on partitions manually. Simply right-click the partition which has errors and select Advanced > Check Partition. In the pop-up window, choose the first option Check partition and fix errors in this partition by using chkdsk.exe. Hope this post helps you!

